Search This Blog

Tuesday, April 25, 2017

Google Cloud Platform Tutorial Series 103


In our previous section we learnt how to operate google cloud platform using a quick start boiler plate for python, in this section we will learn about the containers.
Containers are the heart of google cloud platform, our applications are deployed on containers(Dockers or google containers), these containers are a miniature version of virtual machines.Containers is a bundle of all the required components which are required to run a specific application.There is a one to many relations ship between a virtual machine and containers.
To operate and orchestrate multiple containers google provides; Kubernetes.
image
Kubernetes is used for automating deployment, scaling, and management of containerized applications.

Lets understand a few terms:

  • Cluster : Set of master/ worker nodes.
  • Node: Compute engine instance like a VM
  • Pod: A group of containers mostly Dockers
  • Replication Controller: Replica manager for pods
  • Controller Registry: Registry to host Dockers images

  • Google Cloud Platform Tutorial Series 102


    In our last chapter of google cloud computing platform quick start we learned how to quickly setup the google platform and get started with our first instance inside the cloud.


    There are multiple ways to interact with google platform:

  • Console Access (Easy GUI)
  • REST API(Programming)
  • Google Cloud SDK (Command line)
  • Client Libraries( Google API client library (Java-Python-Node JS etc.) –Discuss later
  •  

    Lets work on the compute engine via the shell and try to create a new instance using shell.

    Console Access


    image

    Sunday, April 23, 2017

    Maximo SAAS on AWS Chapter 106

    In our last tutorial on how to move Maximo to AWS , we saw how all the components were installed on different nodes and how horizontal and vertical clustering will work on WebSphere, In this part of the tutorial we will be doing final testing of our architecture and will start Maximo on both the nodes federated and running in a single Cluster
    Topics
    • Final Configuration
    Final Configuration
    Lets identify the default http port of our MaximoServer3(Custom node) and add it to virtual host.
    Now lets generate the Web Server (HTTP) plugin again and propagate it, so that our HTTP server knows about the new servers on different nodes and can do Round Robin.
    Ref:Generate propagate
    clip_image001
    Again I faced the unexpected- unsupported Class version error while starting my third (maximoserver3) on custom profile and reason is that it might be using the older version. So again we need to do managesdk to enable newer version of JDK for this WAS profile
    java.lang.RuntimeException: java.lang.UnsupportedClassVersionError: JVMCFRE003 bad major version; class=psdi/iface/gateway/

    Friday, April 21, 2017

    Find speed of local application using java


    If you have a local application and you would like to know how much time its taking to load, you can try this simple code snipped to find the load time and get insights on how much time its taking to load.

    Code:
    ==================================================================
    import java.net.*;
    import java.io.*;
    public class TimerTest
    {
        public static final Double NANO_TO_MILLIS = 1000000.0;
        public static void main(String[] args) throws MalformedURLException, IOException
        {
            int i =0;
            while(i<5){
            // start timer
            long nanoStart = System.nanoTime();
            long milliStart = System.currentTimeMillis();
            // do work to be timed
            doWork();
            // stop timer
            long nanoEnd = System.nanoTime();
            long milliEnd = System.currentTimeMillis();
            // report response times
            long nanoTime = nanoEnd - nanoStart;
            long milliTime = milliEnd - milliStart;
            reportResponseTimes(nanoTime, milliTime);
            i++;
            }
        }
        private static void reportResponseTimes(long nanoTime, long milliTime)
        {
            // convert nanoseconds to milliseconds and display both times with three digits of precision (microsecond)
            String nanoFormatted = String.format("%,.3f", nanoTime / NANO_TO_MILLIS);
            String milliFormatted = String.format("%,.3f", milliTime / 1.0 );
            //System.out.println("Milliseconds using nanoTime(): " + nanoFormatted);
            System.out.println("Milliseconds using currentTimeMillis: " + milliFormatted);
        }
        private static void doWork() throws MalformedURLException, IOException
        {
            URL url = new URL("http://google.com");
            URLConnection conn = url.openConnection();
            BufferedReader in = new BufferedReader(new InputStreamReader(conn.getInputStream()));
            System.out.println("Checking "+url.toString());
           
            while (in.readLine() != null) {
                //System.out.println(in.readLine());
            }
            in.close();
        }
    }

    ========================================================================

    Mount AWS S3 bucket on Windows

    If you need S3 bucket for storage of media and other documents, you might need to mount the S3 bucket on windows.

    Step 1: Create a bucket.


    First step is to create a bucket on AWS and save it(100 gig should be enough)

    Step 2 :Download TNT

    You will have to use

    https://tntdrive.com/

    Once you download this, it will install and will open a panel to input access key and secret.

    Get the secret and access key by creating an IAM user on AWS,


    mount s3 on aws windows tnt

    To create access key and secret key, navigate to:


    Create a new user and assign S3 bucket permissions from the select box and save.

    It will give you access key and secret access key, this needs to go to TNT  drive and it 
    will automatically search for our created bucket.

    Connect and it will map a local windows drive with your bucket.


    Now configure doc links for maximo to use this drive.

    Keep Reading ! 


    Google Cloud Platform Tutorial Series 101


    This series will be based on the Googles Cloud Computing Engine.

    image


    Quick start for Google Cloud.

    Lets Get Started.
    Topics


    Prerequisites
    Prerequisites for this tutorial series:
    • Basics of Cloud
    • A Gmail Account
    • A Debit/Credit card to start the free trial GCP.

    Wednesday, April 19, 2017

    Maximo SAAS on AWS Chapter 105


    In the earlier section of the series “Maximo on AWS” , we saw how we could start our Maximo instance on our EC 2 with RDS and vertical clustering enabled with node agent and the HTTP Server running.

    A quick diagram for reference:

    image


    Currently our architecture has a single point of failure.


    So lets federate another horizontal node to our Web Sphere ND and make it highly available.


    Recipe

    • Get a new EC 2 instance
    • Install WAS ND with app server profile
    • Federate and add members to cluster.
    • Generate and propagate web server plugin on node 1 for webserver1
    • Restart every thing and test high availability.


    Maximo SAAS on AWS–Chapter 104


    In our last part of the series on Maximo installation on AWS we saw how Maximo was installed on EC2 instance hosting its on SQL server and WAS ND with vertical clustering only.
    In This tutorial we will be adding a horizontal clustering using another EC2 to WASND and we will be utilizing the Amazons RDS database service to move our database also to scaling mode.

    image
    Lets get started.
    First of all lets get the RDS instance up and running.
    image


    Create a new RDS instance and make sure you select 2014 version only for SQL Server, 2016 is not compatible with Maximo and you might face an error if you try to use 2016. Error shown below.

    Upgrading IBM WebSphere 8.5.5 to 8.5.5.11 the easy way


    If you have WAS 8.5.5 and your application is not starting due to major minor version of class files errors on starting, you might be facing the JDK problem.

    image

    Websphere 8.5.5. is shipped with 1.6 JDK version( which is vague) but your application might have compiled code in recent version of Java.


    So in this case your option is to upgrade to 8.5.5.11 where 1.7.1 and JDK 8 are supported.

    Tuesday, April 18, 2017

    Maximo SAAS on AWS–Chapter 103


    In last tutorial on Maximo on AWS ,  we have moved our stuff to the EC2 instance and in this tutorial we will install the required Maximo software and other middleware components.

    This installation is divided into three parts:
    1. Maximo Base Install
    2. WebSphere and IHS install
    3. Plugin configuration and Horizontal node federation for scaling.

    * SQL Server is not mentioned above because it is already installed and Maximo user is configured and has all the rights.


    Monday, April 17, 2017

    Maximo SAAS on AWS- Chapter 102


    So in our last chapter, we saw how we created an EC2 instance on the amazon ec2 service.

    Agenda for this tutorial will be to get the instance ready and install IBM Maximo middleware components on it.
    Lets get started.

    Connect to EC2 Instance

    To connect to instance we will navigate to ec2 console and see if our instance is created.
    amazon ec2 instance running


    Click on connect.
    awsconnect

    Download the remote desktop file and use the username and password by clicking the get password.It will take you to key pair screen and you need to specify the mykey pair we used in earlier tutorial.

    image
    Now click on decrypt password and you will see RDP password to connect to this instance.
    Now you have all three:
    • Instance URL
    • Username
    • Password

    How to call REST services using conversation service API Part 2 of IBM Watson Chabot series ?


    REST API call from Watson conversation service


    In our last tutorial on IBM Watson chatbot using conversation services we learnt how to setup the chatbot with demo and do a quick start.
    In this tutorial we will see how can we instruct our chatbot to call our custom business logic, depending on the data entered by the user, this also explains how you can leverage this sample to build custom business logic around it.

    Lets take a use case of Maximo application, where user will be reporting a problem with the application and the chatbot will raise a service request for that incident by collecting data from the user.
    Please clone the following repo for this tutorial, customized for this use case.
    https://github.com/systemoutgit/maximobot


    How to make IBM Watson Chatbot using conversation service API Part 1 ?


    IBM has provided a lot of services with Watson platform. One of them is the conversation service which lets you make an intelligent bot for your customers which can be front end for your customers and can help generate leads and help with various other things like :

    • Quick reservations.
    • Service Tickets
    • Help desk operations.
    • Data Queries and analysis

    watson chat bot api
    Source : 1redDrop.com

    So today I will show you how to use that service and integrate that bot with your business. It could be any Java based platform or any other platform which has integration capabilities either by REST or Web Services.
    Lets get started.
    Prerequisites:
    • Node JS
    • Cloud foundry CLI

    Friday, April 14, 2017

    How to configure IBM Watson Conversation API ?


    Quick setup instructions for IBM Watson conversation API, mostly used with Bots and chat app.


    Copy the quick start sample from here.

    https://github.com/watson-developer-cloud/conversation-simple/archive/master.zip

    I changed my .env file and added username and password for the conversation service, you need to create the service from blue mix and use those credentials in this file.


    Also you will need a work space id for conversation service to work.


    Click on launch tool from the service and it will open the workspace manager, here you need to train your bot for various queries.

    Intents should be created and need to be linked with flows and entities.

    For our example we will import the car JSON data from

    training/car_workspace.json

    So it has some default queries answered and for this demonstration we will use this.


    image


    > npm install

    >npm start


    image


    image


    Now you can make your own workspace and train your bot for your queries, later you can plugin this into other apps.


    Keep Reading !

    How to use IBM Watson Text to Speech API via JAVA SDK


    I was trying to see how text can be converted to speech using WATSON API, but due to some or the other reasons I was getting a few errors while trying to test locally as well as on blue mix.


    I followed this link to set up the app.
    https://github.com/watson-developer-cloud/text-to-speech-java

    I could deploy but I was getting some error while testing the text to speech feature.
    For local it gave me error on
    ./target/wlp/bin/bluemixUtility import text-to-speech-service
    Some null pointer exception.

    For Blue mix
    Error while processing in red color on the results section of my page.


    Finally I had to understand the complete code and I got to know that credentials are not submitted properly to the service from the local system and cloud was not able to bind to the service and was giving “Unknown service exception)


    The following setup worked for me, try this.
    Step 1
    > mvn install

    and it created the target folder and it  has a liberty run time with it.
    image

    How to install and configure IBM Watson JAVA SDK


    I know Java SDK can be downloaded from the GIT but I had a few problems to configure it properly.


    Please follow the below steps to configure JAVA SDK for IBM Watson

    First download the SDK from the below URL

    https://github.com/watson-developer-cloud/java-sdk

    Use clone zip or GIT clone or what ever.


    Now go to java-sdk folder and run ( Assuming you have GRADLE installed)

    > gradle eclipse

    It will run for a while and will generate the required JARS and dependencies for your master JAVA SDK project.


    image


    After this, go to Eclipse and import the main java-sdk project.


    image


    Once completed, your workspace will be ready.


    Lets test one of the visual recognition API.


    Code

    ===================================

    package com.ibm.watson.developer_cloud.visual_recognition.v3;

    import java.io.File;

    import com.ibm.watson.developer_cloud.visual_recognition.v3.model.ClassifyImagesOptions;
    import com.ibm.watson.developer_cloud.visual_recognition.v3.model.VisualClassification;

    public class VisualRecognitionExample {
       
          private static final String VERSION_DATE_2016_05_20 = "2016-05-19";
        public static void main(String[] args) {


        VisualRecognition service = new VisualRecognition(VisualRecognition.VERSION_DATE_2016_05_20);
        service.setApiKey("your api key get from blue mix dashboard , create a VR service");


        System.out.println("Classify an image");
        ClassifyImagesOptions options = new ClassifyImagesOptions.Builder()
            .images(new File("src/test/resources/visual_recognition/car.png"))
            .build();
        VisualClassification result = service.classify(options).execute();
        System.out.println(result);
       
    }
    }

    ===========================================


    Result will be returned as


    {
      "images": [
        {
          "classifiers": [
            {
              "classes": [
                {
                  "class": "stock car (racing)",
                  "score": 0.959,
                  "type_hierarchy": "/vehicle/stock car (racing)"
                },
                {
                  "class": "car",
                  "score": 0.996
                },
                {
                  "class": "vehicle",
                  "score": 0.996
                },
                {
                  "class": "race car",
                  "score": 0.747,
                  "type_hierarchy": "/vehicle/race car"
                },
                {
                  "class": "gray color",
                  "score": 0.937
                }
              ],
              "classifier_id": "default",
              "name": "default"
            }
          ],
          "image": "car.png"
        }
      ],
      "images_processed": 1
    }

    My image looks like this

    image


    Point to note is while importing the java sdk, make sure you import the project and not choose the “open project from file system option in eclipse “

    Also you need to exclude parent folder from the build if you do a build all, it might error on build(Remove all sources and do Ctrl+B to build all projects)

    image


    Now you can explore other services from workspace itself, keep getting credentials apikey from blue mix dashboard and test all the services.


    Keep Reading !

    How to use Watson Speech to text API ?


    Speech to text is offered by Watson on blue mix, today we will see how to quickly setup the environment to use this service.


    Prerequisites:

    • Eclipse
    • Blue mix account


    Create a new Java  eclipse project and attach this jar in the build path.

    Now create a class file as shown below


    code

    ========================

    package com.ibm.watson.developer_cloud.discovery.v1;

    import java.io.File;

    import com.ibm.watson.developer_cloud.speech_to_text.v1.SpeechToText;
    import com.ibm.watson.developer_cloud.speech_to_text.v1.model.SpeechResults;


    /**
    * Recognize a sample wav file and print the transcript into the console output. Make sure you are using UTF-8 to print
    * messages; otherwise, you will see question marks.
    */
    public class SpeechToTextExample {

      public static void main(String[] args) {
        SpeechToText service = new SpeechToText();
        service.setUsernameAndPassword("username", "password");

        File audio = new File("src/sample1.wav");
        SpeechResults transcript = service.recognize(audio).execute();

        System.out.println(transcript);
      }
    }


    =======================================================================


    Username and password you can get from blue mix account , by creating a new instance of the service –> add credential


    Now put a sample wav file in the source folder of your eclipse project and run it.


    image


    Copy paste the wav and source for this speech to text demo from this github url.


    image


    The JAR attached has the java-sdk for watson and can be used to call any of the services hosted on blue mix.


    Keep Reading !


    Action Item : Subscribe & Share !

    How to use Watson Discovery service ?


    In this tutorial I will show you how to use Watson Discovery service locally and how to push an app to Blue mix using the cloud foundry command line tools( Node JS version)


    image

    Prerequisites:
    • Node JS
    • Visual Code
    • Blue mix account (Setup free account for 30 days)
    • Cloud foundry CLI

    Step 1 Clone Repo or download as zip from Github
    https://github.com/watson-developer-cloud/discovery-nodejs.git

    Step 2 Go to that folder rename .env.example to .env ( It should have place holders for username and password etc)
    This file need to be updated with the discovery service username and password, it also needs a discovery environment and the collection id( Watson news collection in our case)

    Tuesday, April 11, 2017

    How To Move Maximo Database on SQL Server to AWS using Azure Tool

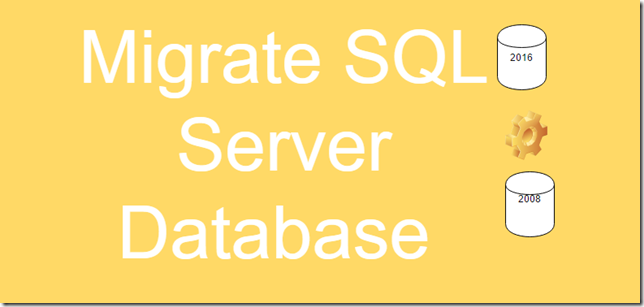
    This article explains how to move Maximo database from SQL Server 2016 to AWS running on SQL Server 2008, using a simple tool provided by Azure platform.
    image

    Download the azure tool from the below path.
    https://sqlazuremw.codeplex.com/

    Open the tool SQLAzureMW.exe from the folder and run it.
    Make sure you have SQL Server installed on the server, else this tool won’t run.


    Monday, April 10, 2017

    Maximo Database Export Import from SQL server


    To export import the Maximo database from one instance to another instance, follow the following steps:


    Step 1 Open the SQL management studio.


    image


    Step 2 Connect to your instance.


    image


    Step 3 Navigate to your database

    image


    Step 4 Backup database

    image


    Step 5 Select the file system and click save.

    image


    Step 6

    image


    Step 7

    Now create a new database in target system.


    image


    Step 8 Restore the Maximo database now from the backup file we got from another instance.

    image


    Step 8 Add your backup location now.


    image


    Step 9

    Your new database is imported.

    IBM Maximo OSLC, update an existing record via HTTP POST

    In case you want to update your OSLC resource from a mobile client, this article will be help full for you.


    Open the postman client and enter the URL for your Maximo server and append _lid &_lpwd to your URL.


    I will be using the Maximo preview site for demonstration purpose.


    image


    Now add the headers which will merge with the existing asset record, make sure you know the assetid of the asset you are going to update.


    You can make a separate GET request to know the assetID of the asset before firing this POST request.

    My AssetID =1 in current example.

    Now add the following headers.

    image

    And keep the payload as

    image


    Now click on send and open another browser window to test the new description of the asset.


    image


    Ref. IBM OSLC knowledge Center


    Keep Reading !

    Sunday, April 9, 2017

    Problems with FTP Server(FileZilla) on Windows 2008 Server R2 using AWS EC2


    Recently I came across a situation where I had to move some stuff from my local system to my Amazon EC2 instance, but I was having problems installing and configuring the FileZilla server on EC2.

    Step 1
    For a while make your security group to access all TCP Traffic from out side world.
    image
    Step 2
    Since you are using windows firewall on server 2008 , make sure you disable it for this test.
    Go to windows firewall configuration and disable both of them for public and private network.

    Step 3
    Now identify the public ipv4 DNS for your instance and try to telnet from your system.

    Step 4
    If you are able to telnet on port 21 and is represented with a FileZilla server message.
    filezilla aws windows server 2008

    Step 5
    Now go to EC2 instance and create user/group/shared directory and home directory for
    FileZilla users on the FileZilla server.

    image

    Set the folder as home directory and click ok.


    Step 6
    Go to settings and use passive mode and enter your public IP address of the instance.

    image

    Step 7
    Restart FileZilla server and upload your install folders.

    Troubleshoot:
    You might see this kind of error if you shared folder has missing rights or your home directory is not setup properly.

    response: 550 user does not have permission to access own home directory filezilla

    Keep Reading !

    Action Item: Share and Subscribe !

    Thursday, April 6, 2017

    How to setup budget and get billing alerts on AWS ?


    A lot of times we create instances on amazon using EC2 and the RDS service which amazon offers and after a few days we start getting invoice for items which we have never used.
    So in this tutorial I will explain you how to setup billing alerts and set budget on AWS so that you don’t face these charges.
    Firs of all we need to set a billing alert and we will create an AWS budget for that.

    image

    Click on create budget.

    image

    Select all services from included service option below budget amount and add your email in notification settings.

    aws budget set alert

    Now click on create and your budget is created, you will start getting billing alerts if the cost crosses 250$.
    aws budget created on amazon

    You can configure your aws budget accordingly, this was just for demonstration.

    Keep Reading !

    Maximo SAAS on AWS–Chapter 101


    Maximo being an ERP is known to have tough installation cycle and usually most of the Maximo installations are known to be on perm.Recently client has started shown interest in SAAS based services and they are interested in getting Maximo as a service.
    IBM has already started giving Maximo as a service,using their soft layer platform to customers.Now they need not rely on service vendors to manage infrastructure, upgrades or installations.
    Continuous integration and continuous deployment has been possible now using the pipelines because all the services are hosted in cloud.
    In this series of tutorial, we will look at how Maximo can be configured to run a service for end customers. This tutorial will be divided in to multiple articles:

    AWS EC2 Creation and setup


    Create a new EC2 instance and select the pre built AMI, which is more like a pre configured virtual machine in cloud.
    Maximo on AWS SAAS AMI

    Next step we need to choose the hardware which is required for our Maximo installation.
    I am selecting the m4.large instance with 2 vCPUs and 8 Gb of RAM.
    Maximo aws hardware requirement
    Lets configure the instance.
    maximo network setting for aws

    image

    Lets go to next step and choose storage for our instance, it will host WebSphere and Maximo on same box, so I need at least  100 Gb of database for that.
    add storage on aws for websphere and maximo database

    I don’t need to tag my instance, so lets leave it blank.

    image
    Now next step is most important step and need to be configured properly for this server to be reachable from your system.
    AWS security group defines, who all can access this instance and on what all ports.
    aws security group maximo
    Since I will be hosting my database and app server on same machine I need not open the Maximo database port 1433 for public or other AWS EC2 instance on the VPC.
    So my final security group will look like this, I am allowing access to all traffic till my instance is configured.( Later I will put restrictions on this security group to be accessed from my VLAN only
    Now try to launch the instance, you might get a warning that this is not covered in free tier as you have selected a larger instance.
    In the next step you will be presented with the key pair dialog box.
    image
    Download this key file and save it at a safe place, this will be used to connect to this instance via the Amazon CLI.
    image
    This instance is created and running in cloud with MSSQL running on Windows Server – 64bit.
    Now in next Chapter 102 of Maximo on AWS series we will see how to load the installers on the servers and start the installation.
    Keep Reading !

    Make sure you set a budget and billing alert to avoid high instances costs, if not in free tier of AWS.

    Action Item: Subscribe and Share