Search This Blog

Friday, December 23, 2016

JBOSS wont start on jdk8

There is a known bug with JBOSS , it won’t start on JDK 8 and will be stuck on boot itself.”Brontes”…

Change standalone.bat to point to jdk 7 or apply the patch from github and build yourself.

Else use wildfly 8.


Tuesday, December 20, 2016

Find loaded class in JVM via the class loader

If you are not sure what all classes are loaded in currently running jvm.
Nice trick to find out what all classes are loaded in the JVM.

Try running this.

java -verbose:class CPTest |findstr URL

It will grep your class and will tell if that is loaded or not.


Wednesday, December 14, 2016

jmx via mission controller

To enable jmx to be used with java mission control.

append the following to the java process, while starting the process.


-Dcom.sun.management.jmxremote=true
-Dcom.sun.management.jmxremote.port=3614
-Dcom.sun.management.jmxremote.authenticate=false
-Dcom.sun.management.jmxremote.ssl=false


Thursday, November 10, 2016

split files in linux

split -b 1024k filename

if file is 10mb

it will generate xa,xb ..... kinda files , each of 1 mb

Tuesday, November 8, 2016

Inspect java code with javasnoop

To inspect the java code on run time for local jvms, download the javasnoop from the below url
https://code.google.com/archive/p/javasnoop/
Once downloaded extract and change the startup.bat to point to your JDK not jre.
i changed to this to make it work with jdk 8 
echo %JAVA_HOME% | find /i "8" > NUL
not startup snoop via the bat or shell.
 
image
 
 
Now either attach to a local jvm process or specify the new process
 
Let me attach to my local eclipse code which i want to debug.
image
 
image
 
image
Add new hook to your class methods
image
 
Now you can print the variables while hook is active and tamper with the parameter and return values at run time.
 
image
 
If hook is active you might see this
image


change the variables in the jvm from here
image
 
Let me rename the variable to another value and see what happens in the target jvm.
i changed the variable to India and return value to india1
image
image


You can see that target jvm has new values now
image
 
This is very helpfull in debugging the COTS products where we don’t have the souce code and neither we are able to regenrate the source code by looking at the decompiiled binaries via JAD or whatever.
 
This will display the actual variables values at run time inside the jvm.
 
Oh one more thing, you can also execute custom scripts after your hooks are active as shown below.
click on this
image
 
image
 
execute now
 
image
Another cool feature is you can track your input data across the methods and classes.
 
You can find out where is the user data going by going into the CANARY mode.
 
Lets see how to enable this.
Go to actions and enable canary mode.
 
Enter the data you are interested in.
image
 
As the code is executed which is operating on the input data there will be a chirp in the canary mode as shown above.
Now you can directly hook all the methods your data is flowing throw, Cool isn’t it ?
I think its a life saver, i used to decompile the binaries from different decompilers and attach the generated source in eclipse to debug earlier, but i guess this is better and faster.
 
Make sure you use JDK to run eclipse else you will get error “ target jvm doesn’t have providers to attach to kinda stuff”
 
Steps required to Demo
  • Run the below code in eclipse using JDK and put a breat point at “ String value = a(abhi);”
  • Now debug the code and let the breakpoint hit the above line.
  • Now seperate cmd window open snoop and attach to the existing jvm.
  • Attach the hook, once attached resume the breakpoint in the eclipse.
  • Your hook will become active and you are ready to rock.
 
 
My source which was running in eclipse,
//
package javacode;

import java.lang.Integer;
import java.util.HashMap;

public class Main
{
private static final String String = null;


public static void main (String[] args) throws java.lang.Exception
{
   
    String abhi="df";
String value = a(abhi);

Thread.sleep(10000);
   
System.out.println(value);
   
}


public static String a(String abhi ) {
    // TODO Auto-generated method stub
   
    System.out.println(abhi);
   
    return abhi;
   
}
}


Monday, November 7, 2016

No initial context if connecting to remove jvm via load balancer jdk 6 --> jdk 8

If you remote server is on jdk 8 and your client is on a lower version of java and you are trying to access the context via the load balancer.

you might face a bootstrap timed out error.

RJVMFinder unable to create or find remote jvm.

Please use this parameter in your target JVM and restart the target server.

enableprotocolswitch=true

It has nothing to do with the loadbalancer configuration , please don't trouble network guys.

Friday, July 15, 2016

JBOSS - not able to lookup the connection factory from remote host

If your jboss is clustered with HAJNDI and it is running on a host with another node.

You telnet it on 1100 and get a marshal object from the port

For example telnet host 1100 and you see a marshaled object in putty, it might be the serialized object,a stub from the remote server.

you might get the reply from 8083 and ha load balance proxy.

Now jboss while it boots acquires port 4447 and your default 8080 and other ports for bisocket connector.So these ports are required for jboss to function properly.

If you are facing issues with looking up the remote CF it might be due to the network connectivity with required ports.

Try following things

Do a lookup from local system if it works you can be sure that the CF jndi is correct.

Now check the firewall status of the your jboss server. $ service iptable status or ip6tables

If it says firewall is turned off, try doing telnet on all the ports required for JBOSS.

You should be able to telnet all the required ports which are required for JBOSS not just the 8080.

If you are not able to telnet required ports from your client it means that you wont be able to do any lookups on the remote naming url, you might get the context though.


Also check for listen ports by

$ netstat -an |grep LISTEN

Check for your source and target specific connection

$netstat -tcp | egrep "clientip|destinationip"


Monday, July 4, 2016

How to start vnc server, connect to it and change password

From putty -->

$vncserver
after you  press enter you will get

-bash-4.1$ vncserver


New 'xxxxx:17 (appltest)' desktop is xxxx:17

Starting applications specified in /homet/.vnc/xstartup
Log file is /home/.vnc/xxxx:17.log


now connect on port 17 in vnc box

host:17 and press connect, before that you can set the password as


vncpasswd

after you press enter it will ask for the new password , use it above to connect.

This is an alternative to export displays from the linux based systems.


Monday, June 27, 2016

How cisco Load balancer works

Cisco ACE  Load balancer has a farm concept( a farm is a pool of target IPs).So incoming request on a port is mapped to a farm and Natting is done under a farm to send the response back to sender.

So For e.g

If a request came from a client for x.x.x.x:8008 it will land on the 8008 farm and will be routed to the farm member which is a pool of ip. The response will follow the same path as request came but while going back it will be sent back to client by the NATTED ip address .

One of the ip under 8008 farm y.y.y.1/y.y.y.2/y.y.y.3 , will send the response back to the client.Different farms have different policies for routes.In case a farm behaves in a different way it should have a different policy.

Friday, June 10, 2016

Enable flight recorder on weblogic

Add this to java options inside setDomainEnv.sh

-XX:+UnlockCommercialFeatures -XX:+FlightRecorder

The information contained in this electronic message and any attachments to this message are intended for the exclusive use of the addressee(s) and may contain proprietary, confidential or privileged information. If you are not the intended recipient, you should not disseminate, distribute or copy this e-mail. Please notify the sender immediately and destroy all copies of this message and any attachments. WARNING: Computer viruses can be transmitted via email. The recipient should check this email and any attachments for the presence of viruses. The company accepts no liability for any damage caused by any virus transmitted by this email. www.wipro.com

Thursday, June 9, 2016

Enable jmx weblogic

Put in startWeblogic.sh if  only for Admin server, else put in startManagedWeblogic if you want for managed server.

set JAVA_OPTIONS=%JAVA_OPTIONS% -Dcom.sun.management.jmxremote -Dcom.sun.management.jmxremote.port=8888 -Dcom.sun.management.jmxremote.ssl=false -Dcom.sun.management.jmxremote.authenticate=false

The information contained in this electronic message and any attachments to this message are intended for the exclusive use of the addressee(s) and may contain proprietary, confidential or privileged information. If you are not the intended recipient, you should not disseminate, distribute or copy this e-mail. Please notify the sender immediately and destroy all copies of this message and any attachments. WARNING: Computer viruses can be transmitted via email. The recipient should check this email and any attachments for the presence of viruses. The company accepts no liability for any damage caused by any virus transmitted by this email. www.wipro.com

Saturday, June 4, 2016

Start managedweblogic with nohup

nohup ./startManagedWebLogic.sh servername  t3://xxxx:8001>>nohupxxxx.out &
nohup will prevent your process from shutting down once the terminal in which you started the process is closed.

Friday, June 3, 2016

Share internet from windows 7 to other computers via ad-hoc wifi network

In case you are short with lan cables and open ports in office and you want to share local interet from a cable to other laptops via wifinetwork, you might have to create an ad-hoc network and bridge it with the local area network.

Details below.


Step 1

Go to network and connections

image

Step2

Press control and select both local area connection and wireless network connection and right click --- add to bridge.

Step 3

Go to manage wireless networks

image


Step 4

create an ad-hoc network for other laptops to connect to your computer, name it router or whatever.

select a password and check the save the network box.(e.g network name   myrouter)


Step 5

Make sure you wifi antenna is on and then connect to your ad-hoc network.It should display waiting for users.

Step 6

Go to antoher computer and search for the wifi network name “myrouter” – connect to it.

Step 7

Once connected from client laptop, your computer should display the status of myrouter as connected.

Step 8

You are done , browse the internet on your client laptop which is connected to network “myrouter” hosted on your computer.

I have used connectify and other virtual router stuff but found this one more efficient and credible, more over its windows OOB so it works flawlessly.
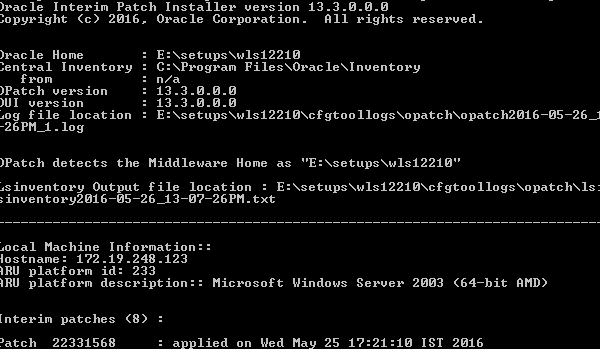
Thursday, May 26, 2016

Apply patch on weblogic

To apply patches released by weblogic, extract the packages from the Oracle support site to your folder.

Go to command prompt and appent OPatch path to the path variable in the windows variable.

Set PATH=%PATH%;E:\setups\wls12210\OPatch

Set ORACLE_HOME = E:\setups\wls12210

Navigate to the patch root folder and run

Opatch lsinventory  and you should see the list of inventory


If everything is set correctly you will see the list of packages installed.

>Opatch apply

And it will apply the package.


Add custom jms properties in the header - weblogic

To add custom jms properties in jms header you need to add string property to the Text message.


                      Context ctx = new InitialContext(env);
                            //ctx.lookup("CreateVASErrorQ20");
                      QueueConnectionFactory factory = (QueueConnectionFactory) ctx.lookup("ConnectionFactory1"); //Connection Factory JNDI

                      QueueConnection con = factory.createQueueConnection();

                      QueueSession session = con.createQueueSession(false, Session.AUTO_ACKNOWLEDGE);

                      Queue queue = (Queue) ctx.lookup("Queue1"); //Find the Queue

                      QueueSender sender = session.createSender(queue); //Instantiating the message sender

                      TextMessage message = session.createTextMessage("Message sent again");
                            
                      message.setStringProperty("system", "prod");
                      con.start();

                     sender.send(message);


This will appear in the message like


Wednesday, May 25, 2016

Create jms on Weblogic 12c (OSB) cluster–JMS servers health not up.


bug #  21830665.

Version 12.2.1.0.0

21830665: HEALTH CHECK RESULT OF JMS SERVERS ARE LEFT BLANK

JMS infrastructure on above versions of weblogic using OSB 12c  will not work untill the patch 21830665 is applied.

Once the patch is applied , follow the configuration below to make it work.

Create a cluster.

A cluster will contain two managed servers ms1 and ms2 and cluster name is mycluster(select unicast mode of messaging)

image

Both ms have different ports and are started by going to domains/bin startManagedServer.cmd ms1 (press enter and username/pwd  when asked)

image

Get your cluster up and running.

Now go to JMS servers and create two new jms servers pointing to both managed servers ms1 and ms2.

JMServer1 and JMServer2 both pointed to two managed servers.(JMS servers act as containers for the JMS infrastructure and are mapped directly to either managed servers or the clusters)

image

Use filestore for both of the jms servers.


Now go to JMS modules

Create a jms module called clusterjmsmodule, in targets select the cluster so that jms servers under that clusters are available for subdeployment mapping of other jms resources in this module.

Create a connection factory and map it to the cluster.

Create queue1 and create a sub-deployment and select the first jms server, similarly create another queue and map it to the other jmsserver.

image

JMS Server health should be green after this configuration is complete and you should be able to see monitoring tab in the queues.


Use a program in eclipse to send message to queueu and see the count of messages in monitoring tab of queue.

Use this link bottom line code ,  to find out how to send messages to a queue via code.

image


P.S File store statistics should be available if the JMS servers are up and running fine.

Create jms bridge in weblogic

Jms bridge is like a forwarder which is used between two different versions or domains of weblogic and is used to forward messages from one destination(queues) to another destination(queue)

To create a bridge between two weblogics W1 and W2 you will have to create two destinations.
Bridge source is going to be your source queue on W1 and destination is going to be the target queue on the W2 server.

image

Source destination looks like this
image

Q3 is my local queueu in W1.

Now create bridge destination
image

Now use this code to send message to the q3 on W1 and it should forward to queue4 on W2

////////////////////


    import javax.jms.*;
import javax.naming.*;

    public class Consumer {
        /**
         * Main method.
         *
         * @param args     the destination used by the example
         *                 and, optionally, the number of
         *                 messages to send
         */
       
        static java.util.Hashtable env;
        public static void main(String[] args) {
            final int NUM_MSGS;
           /* if ((args.length < 1) || (args.length > 2)) {
                System.out.println("Program takes one or two arguments: " +
                    "<dest_name> [<number-of-messages>]");
                System.exit(1);
            }*/
            // String destName = new String(args[0]);
           
          
            /*
             * Create a JNDI API InitialContext object if none exists
             * yet.
             */
            Context jndiContext = null;
            try {


                env = new java.util.Hashtable();
                env.put("java.naming.factory.initial", "weblogic.jndi.WLInitialContextFactory");
               
                System.out.println("-- ok 1 -- ");
               
                /*env.put("java.naming.provider.url", "t3://10.105.98.8:7001");
                env.put("java.naming.security.principal", "weblogic");
                env.put("java.naming.security.credentials", "weblogic");
                */
                env.put("java.naming.provider.url", "t3://localhost:7004");
                env.put("java.naming.security.principal", "weblogic");
                env.put("java.naming.security.credentials", "weblogic@123");
               
                System.out.println("-- ok 2 -- ");
               
                jndiContext = new InitialContext(env);
              //  jndiContext.lookup("weblogic.jndi.WLInitialContextFactory");
               
               
                System.out.println(" jndiContext - " + jndiContext);
               
            } catch (NamingException e) {
                System.out.println("Could not create JNDI API context: " +
                    e.toString());
                System.exit(1);
            }
            /*
             * Look up connection factory and destination.  If either
             * does not exist, exit.  If you look up a
             * TopicConnectionFactory or a QueueConnectionFactory,
             * program behavior is the same.
             */
            ConnectionFactory connectionFactory = null;
            Destination dest = null;
            try {
                System.out.println(" -- ok 3 -- ");


            //    System.out.println("Lookup done----------  " +   obj);


                Context ctx = new InitialContext(env);
                    //ctx.lookup("CreateVASErrorQ20");
                QueueConnectionFactory factory = (QueueConnectionFactory) ctx.lookup("ConnectionFactory1"); //Connection Factory JNDI
                QueueConnection con = factory.createQueueConnection();
                QueueSession session = con.createQueueSession(false, Session.AUTO_ACKNOWLEDGE);
                Queue queue = (Queue) ctx.lookup("Queue1"); //Find the Queue
                QueueSender sender = session.createSender(queue); //Instantiating the message sender
                TextMessage message = session.createTextMessage("Message sent again");
                      
                con.start();
               sender.send(message);
               System.out.println(" -- Message sent -- ");
               
               
              // Now receiving the message:
                int count = 0 ;
               
                QueueReceiver receiver = session.createReceiver(queue);
              while(true) {
                  TextMessage receivedMessage = (TextMessage)receiver.receiveNoWait();
                if(receivedMessage != null) {
                if(receivedMessage instanceof javax.jms.TextMessage) {


                System.out.println("Received message = " + receivedMessage);
               
                System.out.println(" -- Message Received -- "+receivedMessage.getJMSMessageID());
               
                count++;
                } /*else {
                break;
                }*/
                }
                }


            //    System.out.println(" -- Message Received -- "+receivedMessage.getJMSMessageID());
               
               
                /*connectionFactory = (ConnectionFactory) jndiContext.lookup("PrepaidActValDS");
                dest = (Destination) jndiContext.lookup(destName);
                System.out.println( "dest "+ dest);*/
               
            } catch (Exception e) {
                System.out.println("JNDI API lookup failed: " + e.toString());
                e.printStackTrace();
                //System.exit(1);
            }
            /*
             * Create connection.
             * Create session from connection; false means session is
             * not transacted.
             * Create producer and text message.
             * Send messages, varying text slightly.
             * Send end-of-messages message.
             * Finally, close connection.
             */
           // Connection connection = null;
           // MessageProducer producer = null;
//            try {
//                connection = connectionFactory.createConnection();
//
//                Session session =
//                    connection.createSession(false, Session.AUTO_ACKNOWLEDGE);
//                producer = session.createProducer(dest);
//
//                TextMessage message = session.createTextMessage();
//
//                for (int i = 0; i < NUM_MSGS; i++) {
//                    message.setText("This is message " + (i + 1));
//                    System.out.println("Sending message: " + message.getText());
//                    producer.send(message);
//                }
//
//                /*
//                 * Send a non-text control message indicating end of
//                 * messages.
//                 */
//                producer.send(session.createMessage());
//            } catch (JMSException e) {
//                System.out.println("Exception occurred: " + e.toString());
//            } finally {
//                if (connection != null) {
//                    try {
//                        connection.close();
//                    } catch (JMSException e) {
//                    }
//                }
//            }
        }
    }

Wednesday, April 20, 2016

hindi characters going as question mark while using java and mysql

change the database string to
url=jdbc:mysql://localhost:3306/PT?useUnicode=true&characterEncoding=UTF-8
to enable unicode character support.

change table character set also
image

Tuesday, April 19, 2016

set m2_repo as maven variable in eclipse

To set m2_repo, go to your users folder and search .m2/repository and set this path in eclipse – window-preferences-buildpath-classpathvariable
set M2_REPO –> .m2/repository

rebuild

Thursday, April 7, 2016

mysql login via command line

go to mysql/bin

mysql.exe -u root -proot dbname -h localhost

taking dump

mysqldump.exe -uroot -proot dbname >dbname.sql


Thursday, March 31, 2016

PXE-M0F: Exiting Intel PXE ROM. Operating System Not Found"

image


While trying to add machines i was not able to boot the machines from the vmimages provided in the Datastore.

I tried multiple options like

  1. F2—>change boot order –>CD rom first
  2. Changed guest os to Windows/linux/solaris etc.
  3. Tried to change boot options by delaying it to 10000 ms
  4. Tried deleting and adding new machines and also tried to add local iso.


Finally i found out that the iso which were provided by vmware were corrupted and one of my damnsmalllinux.iso worked perfectly.

Please check your iso and try again.

Tuesday, March 22, 2016

“Too many open files “ error on weblogic or any other server

This usually happens because of lack of open file handles which we call as file descriptors.

On unix based systems current limits can be checked with ulimit –a

its defaulted to 1024.

For weblogic or servers you will have to change the default limit.

check current limits in /etc/security/limits.conf

Add the limit at user/group level here or set the limit in setDomainEnv.sh if your user has sudo or permission to change this parameter.

Adding ulimit –S –n XXX/ulimit –H –n XXX  at setDomainEnv.sh or CommonEnv.sh did not reflect the changes for me.

Its a good idea to set it in limits.conf file and restart all the services for that user.

Its advisable as per oracle docs to set hard limit to 65k.

image

Friday, March 18, 2016

Not able to ssh to a host any more


If you were able to login to a remote host and now its failing with errors like “ Remote host identification has changed”

“It is possible that someone is doing something nasty “


Just try to delete the known_hosts file in the

/home/%Userprofile%//.ssh/known_hosts

Make a backup by cp /path/filename /path/filename_backup before deleting


image

After deleting the known_hosts file you will be able to login

Thursday, March 17, 2016

How to transfer data across virtual machines(virtual box/vmware) across different networks ?


To transfer data across multiple virtual machine lying in different netwoks and on different systems,
you can use the port forwarding feature in virtual machines.

image
click on port forwarding and set the incoming port of host and target port of the virtual machine.

image

here you can see if  a remote virtual machine v1 hosted on h1 wants to ssh to virtual machine v2 hosted on host h2
so it can do  ssh root@h2  -p 49837  and it will connect to V2 hosted on H2.
// easy way out –you can set incoming and outgoing both port as 22 if it is free and available to you.
I came across this problem specifically for moving docker images from one vm to another vm on different systems becuase for boot2docker image , the virtual box guest addition doesn’t work
Instead if you try to put guest addition on virtual box which is running docker, it stops booting and show a black screen.
// had to do another fix for it – revmove guestaddition iso from storage – in vm settings

Docker Basics -101


Docker is same like a virtual machine except it doesn’t have its on kernel and its container based.
Docker images can be built from docker files and deployed on multiple containers in same virtual machine.
Docker is more application oriented and doesn’t required seperate OS resources.

For windows docker can be installed by the docker toolkit which is a handle to docker virtual machine (default) which hots docker daemon.
$docker  // will give you all the options available to docker
even if you are on windows you can directly open the virtual box and login to the vm and execute your commands directly instead of using docker client.
To list images do
$docker images // –q for just ids/numerics
To save an image
docker save –o /path/imagename.tar  image-name ( i found repository name working here, the first column on list images screen)
save docker image
here codenvy/che is the repository name

To move images between different systems , use scp

scp image.tar root@ip:location //
now go to target system and do
$docker load < image.tar

Friday, March 11, 2016

Grep doesn't work in solars

Try this

find . | xargs grep "keyworld" "path"

Continuous netstat also doesn't work on that so use script tag instead.


$ script  filename.txt // will start recording

do netstat or whatever

$exit
and your terminal output is recorded on the file , kool feature.

Tuesday, March 8, 2016

use nmap in kali linux

nmap -v -A -Pn hostname -oX path  for export

once results come  use xsltproc to convert xml to html

xsltproc source dest


Sunday, March 6, 2016

how to use github

Open git bash - if on windows

Create a folder where you want to have your local repository.

$ git init // will create a .git file

$git config --global user.name "username"

$git config --global user.email "xxx@gmail.com"

$echo "# gold" >> README.md

$git init
$git add README.md
$git commit -m "first commit"
$git remote add origin https://github.com/username/gold.git

git push -u origin master


Monday, February 29, 2016

basic linux command

find a keyword

grep -rnw 'path'  -e "pattern"

find  . -name "name of file"

Friday, February 26, 2016

Find website load times with simple java code

import java.net.*;
import java.io.*;

public class TimerTest
{
    public static final Double NANO_TO_MILLIS = 1000000.0;
    public static void main(String[] args) throws MalformedURLException, IOException
    {
    int i =0;
    while(i<5){
        // start timer
        long nanoStart = System.nanoTime();
        long milliStart = System.currentTimeMillis();

        // do work to be timed
        doWork();

        // stop timer
        long nanoEnd = System.nanoTime();
        long milliEnd = System.currentTimeMillis();

        // report response times
        long nanoTime = nanoEnd - nanoStart;
        long milliTime = milliEnd - milliStart;
        reportResponseTimes(nanoTime, milliTime);
        i++;
    }
    }

    private static void reportResponseTimes(long nanoTime, long milliTime)
    {
        // convert nanoseconds to milliseconds and display both times with three digits of precision (microsecond)
        String nanoFormatted = String.format("%,.3f", nanoTime / NANO_TO_MILLIS);
        String milliFormatted = String.format("%,.3f", milliTime / 1.0 );

        //System.out.println("Milliseconds using nanoTime(): " + nanoFormatted);
        System.out.println("Milliseconds using currentTimeMillis: " + milliFormatted);
    }

    private static void doWork() throws MalformedURLException, IOException
    {
        URL url = new URL("http://google.com");
        URLConnection conn = url.openConnection();
        BufferedReader in = new BufferedReader(new InputStreamReader(conn.getInputStream()));
        System.out.println("Checking "+url.toString());
       
        while (in.readLine() != null) {
        //System.out.println(in.readLine());
        }
        in.close();
    }
}

Monday, February 22, 2016

Grep linux

To find a string in various files on the system.

grep -rnw './path' -e 'pattern'

to search in current file

grep "string" filename

to find cpu

cat /proc/cpuinfo

To find memory

cat /proc/meminfo

Saturday, February 13, 2016

codeigniter .htaccess file working

RewriteEngine on
RewriteBase /
RewriteCond %{REQUEST_FILENAME} !-f
RewriteCond %{REQUEST_FILENAME} !-d
RewriteRule ^(.*)$ /index.php?/$1 [L] 

Mysql command line import


go to /bin/mysql.exe -u username -ppassword dbname < "c:\user\import.sql"


no space after -p 

Wednesday, February 10, 2016

Monitor Weblogic via JMX code

Enable JMX via java options in setDomainenv.cmd/sh   located in your user_projects/domain/your_domain/bin/

Go to last and find out JAVA_OPTIONS

Append the JMX parameters to the options

set JAVA_OPTIONS=%JAVA_OPTIONS% -Dcom.sun.management.jmxremote -Dcom.sun.management.jmxremote.port=8888 -Dcom.sun.management.jmxremote.ssl=false -Dcom.sun.management.jmxremote.authenticate=false

Restart the server run this java code , this will monitor memory,threads and deadlocks on your weblogic server and add it to an alert file. You can add SMTP details to get an email in case the thresh hold is reached.

/*
 * To change this license header, choose License Headers in Project Properties.
 * To change this template file, choose Tools | Templates
 * and open the template in the editor.
 */


import java.io.BufferedWriter;
import java.io.FileWriter;
import java.io.IOException;
import java.io.PrintWriter;
import java.lang.management.ManagementFactory;
import java.lang.management.ThreadMXBean;
import java.net.MalformedURLException;
import java.util.Date;
import java.util.HashMap;
import javax.management.AttributeNotFoundException;
import javax.management.InstanceNotFoundException;
import javax.management.MBeanException;
import javax.management.MalformedObjectNameException;
import javax.management.ObjectName;
import javax.management.ReflectionException;
import javax.management.openmbean.CompositeData;
import javax.management.remote.*;

/**
 *
 * @author AB839805
 */
public class JMXCron {

    /**
     * @param args the command line arguments
     */
    public static void main(String[] args) throws IOException, MBeanException, AttributeNotFoundException, InstanceNotFoundException, ReflectionException, MalformedObjectNameException  {
   BufferedWriter writer =null;
        String host ="your server ip",threadState = "";
int port = 8888;
HashMap map = new HashMap();
boolean deadLockFound = false;
String[] credentials = new String[2];
credentials[0] = "username";
credentials[1] = "password";
map.put("jmx.remote.credentials", credentials);
JMXConnector c = JMXConnectorFactory.newJMXConnector(createConnectionURL(host, port), map);
c.connect();

ObjectName runtimeService = new ObjectName("com.bea:Name=RuntimeService,Type=weblogic.management.runtime.RuntimeServiceMBean");

//ObjectName sr = (ObjectName) c.getMBeanServerConnection().getAttribute(runtimeService,"ServerRuntime");
//ThreadPoolRuntimeMBean threadPoolRuntimeMBean = runtimeService.getThreadPoolRuntime();
//ObjectName[] managedServers = (ObjectName[])c.getMBeanServerConnection().getAttribute(runtimeService, "ServerRuntimes");
 //String threadCount = (String) c.getMBeanServerConnection().getAttribute(
   //             new ObjectName(ManagementFactory.THREAD_MXBEAN_NAME), "ThreadCount").toString();
 
 ThreadMXBean thMxB = ManagementFactory.getThreadMXBean();
 long [] runningThreads = thMxB.getAllThreadIds();


 for( int i =0;i<runningThreads.length;i++){
     threadState += thMxB.getThreadInfo(runningThreads[i]).getThreadState().toString()+"/";
    }
  System.out.println("thread state "+threadState);

 if(thMxB.findDeadlockedThreads()!=null)
 deadLockFound = true;

 System.out.println("thread count"+thMxB.getThreadCount());

//weblogic.health.HealthState tpHealthState = (weblogic.health.HealthState) connection.getAttribute(serverTP, "HealthState");

Object oM = c.getMBeanServerConnection().getAttribute(new ObjectName("java.lang:type=Memory"), "HeapMemoryUsage");
Object oT = c.getMBeanServerConnection().getAttribute(new ObjectName("java.lang:type=Threading"), "ThreadCount");


CompositeData cd = (CompositeData) oM;
Long used = (Long) cd.get("used");
 Long max = (Long) cd.get("max");
Long percentage = ((used * 100) / max);

System.out.println("Percentage of memory used  "+percentage + "%" );

if(percentage>10 ){
   
   //writer = new PrintWriter("d:\\alert.log", "UTF-8");
   writer = new BufferedWriter(new FileWriter("d:\\alert.log ", true));
writer.newLine();
writer.append("Percentage of memory used  "+percentage + "% "+(new Date())+"\n Thread Count "+runningThreads.length+" Thread State "+threadState);
writer.close();
}
if(deadLockFound ){
   
   //writer = new PrintWriter("d:\\alert.log", "UTF-8");
   writer = new BufferedWriter(new FileWriter("d:\\alert.log", true));
writer.newLine();
writer.append("Dead Lock Found at "+(new Date()));
writer.close();
}

    }
    private static JMXServiceURL createConnectionURL(String host, int port) throws MalformedURLException
{
    return new JMXServiceURL("rmi", "", 0, "/jndi/rmi://" + host + ":" + port + "/jmxrmi");
}
   
}
///////////////


It will output like 
run:
thread state TIMED_WAITING/TIMED_WAITING/TIMED_WAITING/TIMED_WAITING/RUNNABLE/RUNNABLE/WAITING/WAITING/RUNNABLE/
thread count9
Percentage of memory used  30%


In case you want to automate , run it as a cron.

Make a shell file and give chmod+x yourshell file 

contents of shell file 
//

#!/bin/bash
cd /your path where java file is located 
java JMXCron  // name of your java file 


now go to crontab -e on unix and edit the cron tab file so that you can schedule this JMX cron to run at a scheduled time.

To run this Memory/Thread/Deadlock analysis on weblogic every minute.

////////////

* * * * * //jmx.sh  /Monitoring/cron.log


It will give the log output to cron.log and will generate a cumulative memory report.


Thursday, February 4, 2016

Run TestNg with selenium for load testing and generate Reports from ATU framework

package testng;

import java.util.Date;

import org.openqa.selenium.By;
import org.openqa.selenium.WebDriver;
import org.openqa.selenium.WebElement;

import org.openqa.selenium.firefox.FirefoxDriver;
import org.openqa.selenium.htmlunit.HtmlUnitDriver;
import org.testng.Assert;
import org.testng.ITestResult;
import org.testng.annotations.AfterMethod;
import org.testng.annotations.Listeners;
import org.testng.annotations.Test;
import org.testng.annotations.BeforeTest;
import org.testng.annotations.AfterTest;
import atu.testng.reports.ATUReports;
import atu.testng.reports.listeners.ATUReportsListener;
import atu.testng.reports.listeners.ConfigurationListener;
import atu.testng.reports.listeners.MethodListener;
import atu.testng.reports.logging.LogAs;
import atu.testng.reports.utils.Directory;
import atu.testng.reports.utils.Platform;

@Listeners({ ATUReportsListener.class, ConfigurationListener.class,
MethodListener.class })
public class Scale {


public Scale(){
System.setProperty("atu.reporter.config", "E:\\atu.properties");
}

// constructor for report parameters

public Scale(String reportName ){

ATUReports.indexPageDescription = reportName;
}


  @Test(invocationCount = 10 ,threadPoolSize =10)
public void loadTestThisWebsite() {

 HtmlUnitDriver unitDriver = new HtmlUnitDriver();
 unitDriver.setJavascriptEnabled(true);
 unitDriver.get("http://localhost/PT");
 WebElement button = unitDriver.findElement(By.name("submit"));
 button.click();
 String title = (String) unitDriver.executeScript("return document.title");
 System.out.println("Tittle  is " + title);
 if("Welcome".equals(unitDriver.getTitle()))
 {
 ATUReports.add("Load time", "PASS", true);
// Thread.sleep(2000);
 String currentDate = (new Date()).toString();
ATUReports.currentRunDescription= currentDate;
        System.out.println("Report Name "+Directory.RUNDir);
 }

 else
 Assert.fail("I have thrown Exception");

 unitDriver.quit();

}
  /*
  @AfterMethod
  public void getRunTime(ITestResult tr) {
      long time = tr.getEndMillis() - tr.getStartMillis();
      System.out.println("Time taken for the request "+ time+" millisec");
  }
 
  */

}

Run TestNG programmatically from Eclipse


Make sure your testng.xml is in some folder and it is used as shown below.


package initialize;

import java.util.ArrayList;
import java.util.List;

import org.testng.TestListenerAdapter;
import org.testng.TestNG;

public class test {

/**
* @param args
*/
public static void main(String[] args) {
// TODO Auto-generated method stub
 TestNG testng = new TestNG();
 
   TestListenerAdapter tla = new TestListenerAdapter();
   List<String> testFilesList = new ArrayList<String>();
   testFilesList.add(".\\resources\\testng.xml");
   System.out.println(System.getProperty("user.dir"));
testng.setTestSuites(testFilesList); //you can addd multiple suites either here by adding multiple files or include all suites needed in the testng.xml file
       testng.setUseDefaultListeners(false);
       testng.addListener(tla);
       testng.run();
}

}


Tuesday, January 26, 2016

Eclipse Che install on windows

Tried all the install methods on the downloads page the stuff that worked for me on windows 7 was .

Get the git from the repo.
https://github.com/codenvy/che

Follow the read me and build from source with mvn clean install


che.bat start and tomcat is started.

http://localhost:8080/ide ( please note localhost:8080 won't open any thing)


Tuesday, January 19, 2016

cordova not found

By default your node modules will be installed under the user folder and the path will not be registered with the windows PATH variable.

So add the path to the path variable and run the cordova example.

its not the case with the OOB node modules , they will be available in the path.

It got me confused for a while,

Monday, January 18, 2016

install custom apk to android emulator

if you have got an apk out of phonegap and you are wondering how to test it on android device.

export the apk from the build.phonegap.com and run the below command from android studio.

E:\sdk_android\platform-tools>adb.exe install "hello-debug.apk"

find mysql port

go to bin 
mysql.exe 

 SHOW GLOBAL VARIABLES LIKE 'PORT';